Serving Tray
 |
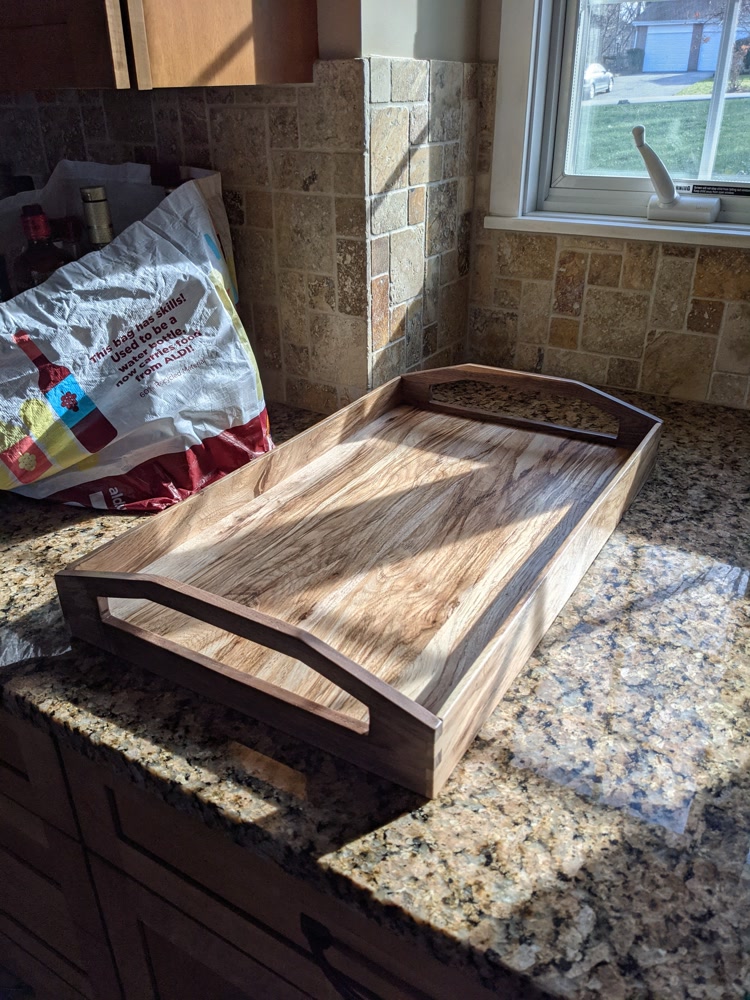 |
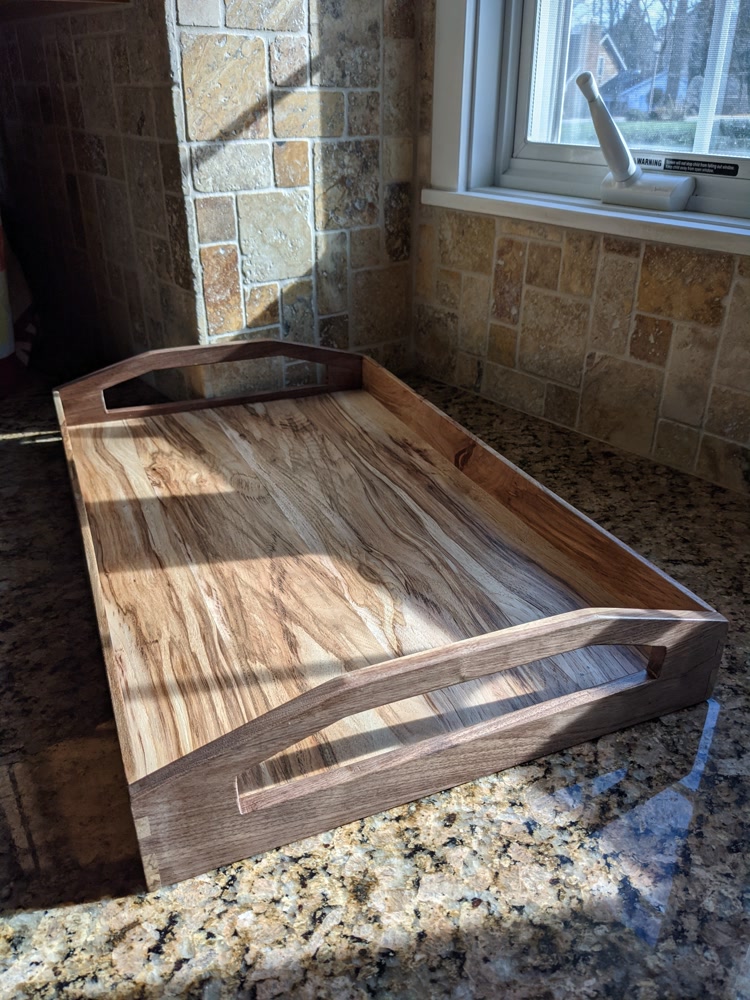
Finished
So this project was a lot of work. I came home from the sawmill with a long 1x12” hickory board and a smaller piece of walnut. The walnut was pretty thick, so I figured I’d be able to get both sides out of it. If that worked, I’d then rip some of the hickory to make small sides for a lip around the edge of the tray.

 |
 |
The walnut rip actually went super well. I’d never ripped wood like this on the bandsaw, but a new 1” bandsaw blade made quick work of it. I then proceeded to cut and rip a few pices of hickory for the sides. All going smoothly.
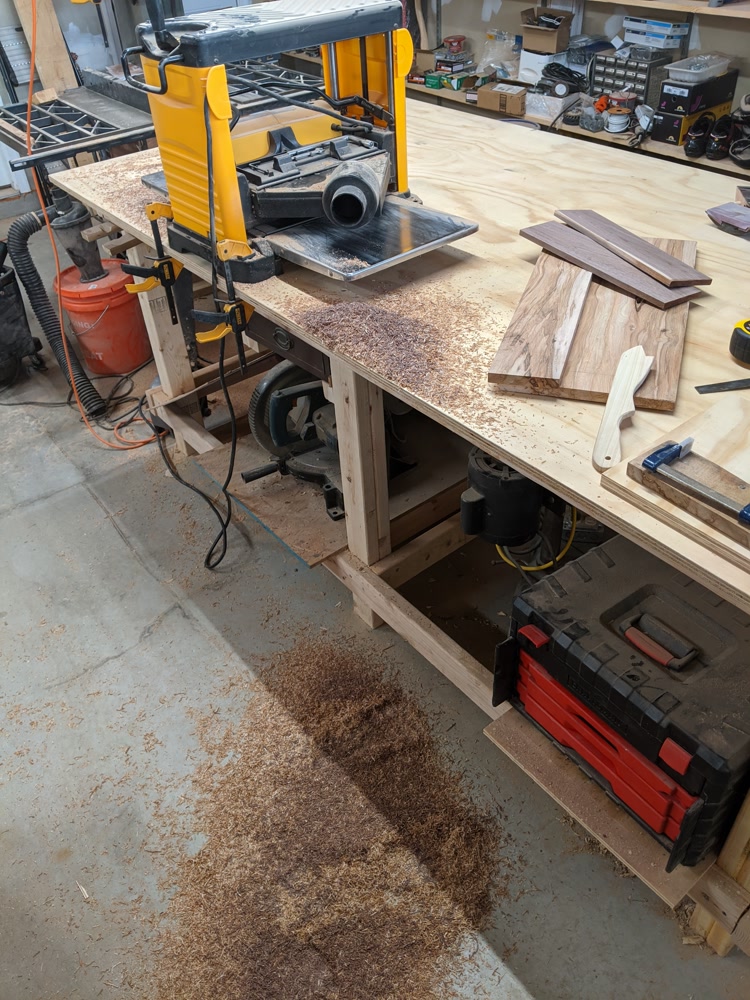
And into the planer!
But here’s where I started running into trouble… It turns out the hickory boards I got were pretty twisted. As I cut the boards apart, some stress was relieved and the boards twisted even more. To get these flat I’d have to take a lot of thickness off, enough that it would probably not be stiff enough to hold lots of weight. The other issue was that I’d cut the sides thin enough that I couldn’t float the entire bottom inside the tray (which would account for wood movement).
It turned out there was a relatively straightforward solution (though it involved a bit more work). I had a 3/4” piece of birch plywood big and sturdy enough to use as a base, and the ripping I’d done for the sides went so well I figured I’d be able to make a thick hickory veneer using the same technique. So I did.
 |
 |
The sheets came out to be somewhere around 1/8” thick. Having never veneered before, I had no idea that I could have used liquid cement… Oh well. Wood glue I guess worked fine too, though I had to be really careful about applying even pressure and not trapping moisture so I wouldn’t get bubbling.
 |
 |
Once that dried I just trimmed off the overhang with an edge trimmer and was on my way. At this point it’s starting to roughly resemble a serving tray. Exciting!
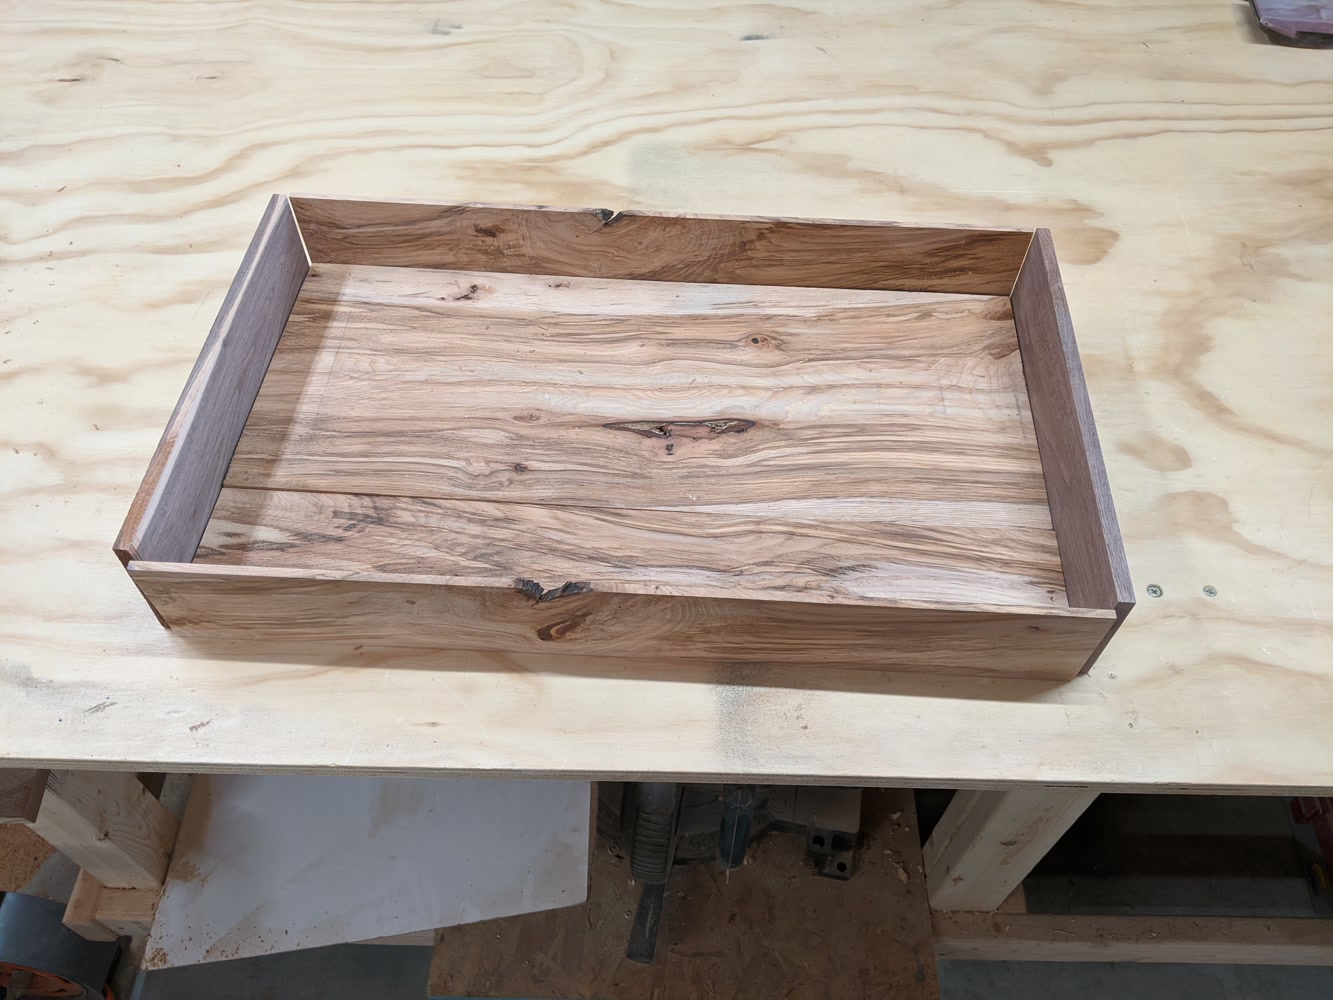
Next up was some joinery on the corners. I just used box joints, with some strategic spacing to hide the groove I cut out of the walnut sides to support the plywood tray. Cutting these with a sled on the table saw was a little tricky to get just right, but yielded a pretty solid fit
 |
 |
And now on to the fun part: making the handles into handles! This probably wouldn’t have been too hard to cut out with a jigsaw, but I don’t really trust the jigsaw I have for anything remotely precise. Instead I drilled some tiny holes pretty much everywhere there was a corner. From there I stuck a coping saw through the holes and cut between each of the holes.
 |
 |
As you can imagine, this left a pretty rough finish… From there I used chisels, a small plane, files, and sandpaper to bring it all in to final shape.
 |
 |
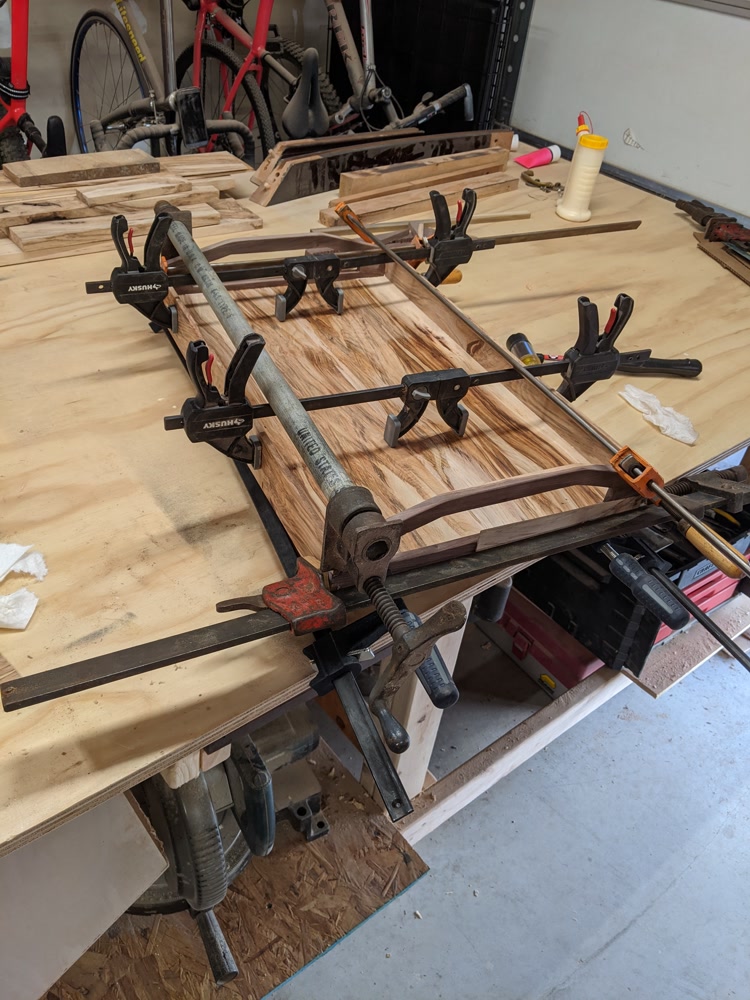
From there, it was finally time to bring it all together into a real tray:
 |
 |
Then just add some glue + pressure and bing bang boom we’ve got ourselves a serving tray.
Of course I added finish and sanded in between coats to make it a bit more resistant to moisture, but then it was done! Happy birthday Mom!
|
|